
Home Business Web Analytics Article
The first step towards boosting conversion rates is to add WidgetSquad pixel code to your website and / or landing pages. Make sure you include the WidgetSquad pixel on every page you’d like to capture data from or display notifications on.
Once logged in to your WidgetSquad account, click on Create Campaign button, it'll open Create Campaign popup.
![]()
Enter your website name and domain name then click on Create button.
![]()
Click on "Copy Pixel" button to copy your pixel code to clipboard, or you can send your pixel code to your developer by clicking on Send to Developer button.
![]()
Paste the code you have copied before the closing of </head> tag of your website.
If you’d like guidance on installing your pixel on a particular platform, please check our many platform specific articles.
Once installed, clear the cache of your website and visit your site in a few different browsers. Then refresh your campaign page, you can notice "Pixel Installed" below Install Script button, It means you had successfully installed pixel code in to your website:
![]()
You can easily install WidgetSquad pixel, using "Header and Footer Scripts" wordpress plugin.
First, let's install the plugin:
Now go to Settings > Header and Footer Scripts
Paste your WidgetSquad pixel script in to "Scripts in header" box and Save.

That's it! you are ready to go.
Step 1 : Go to your Shopify admin site and click on "Online Store" link from menu.
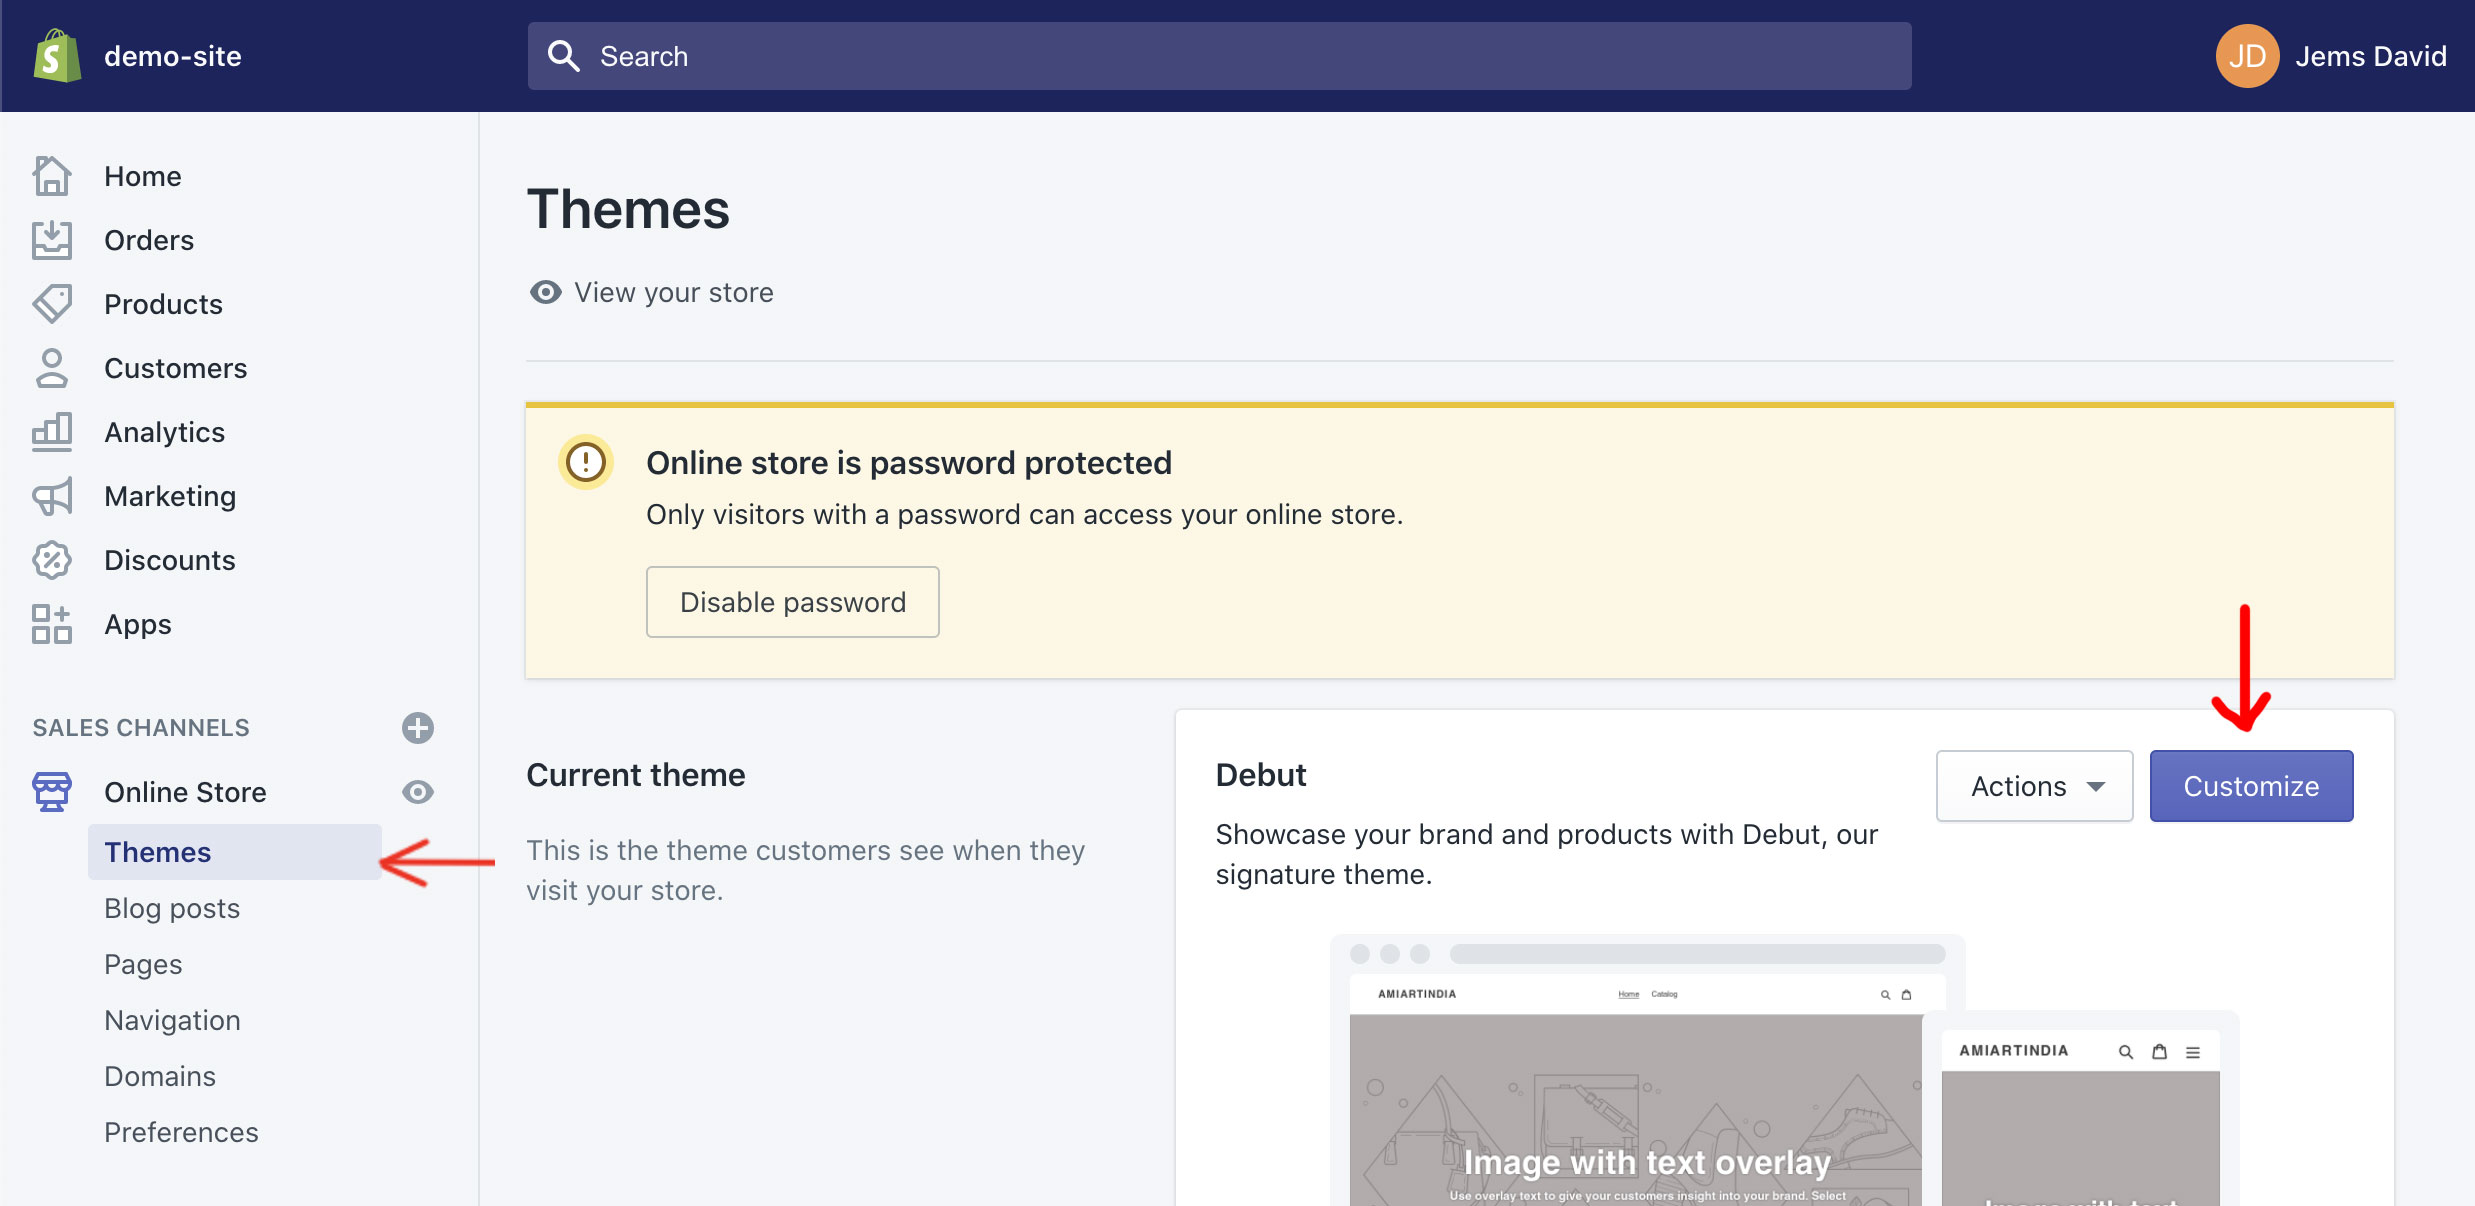
Once you’ve open the "Themes" section, you will be able to see the "Customize" button in the right side of the screen, just click on it.
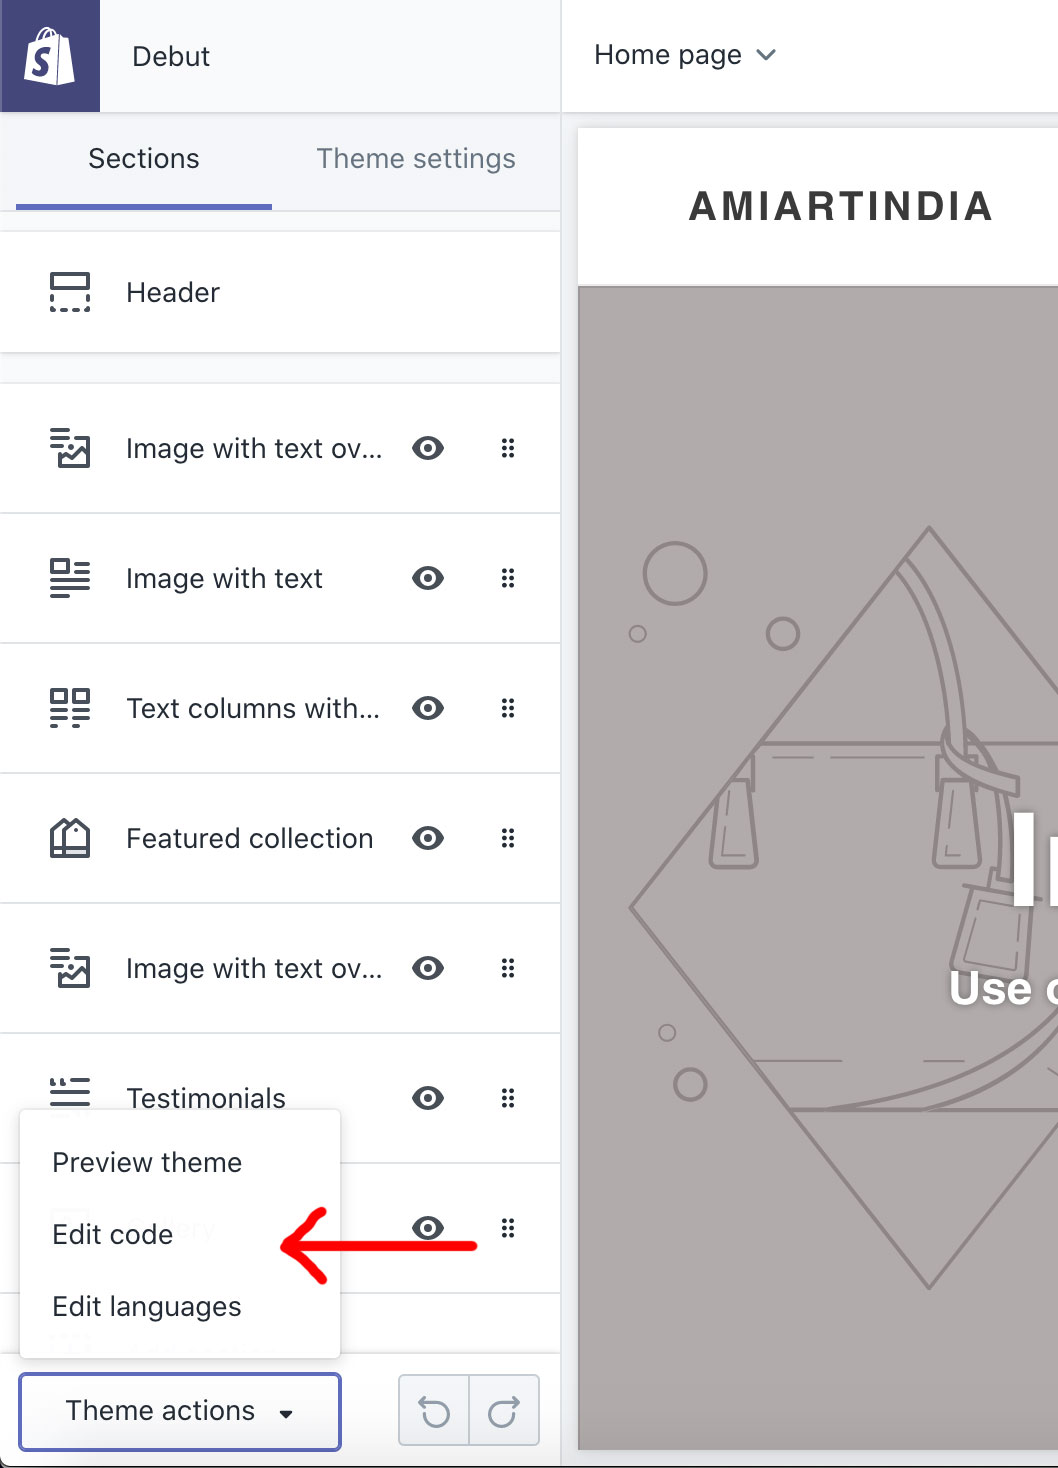
Step 2 : Now go to the lower left side corner, where you will see an option "Theme actions" click on it, this will display a list of options where you'll find "Edit code" option.
Step 3 : Now go to the "Layout" folder and click on it to display a .liquid files list, now click on "{/} theme.liquid", this will automatically generate a code file in the right side of the screen.
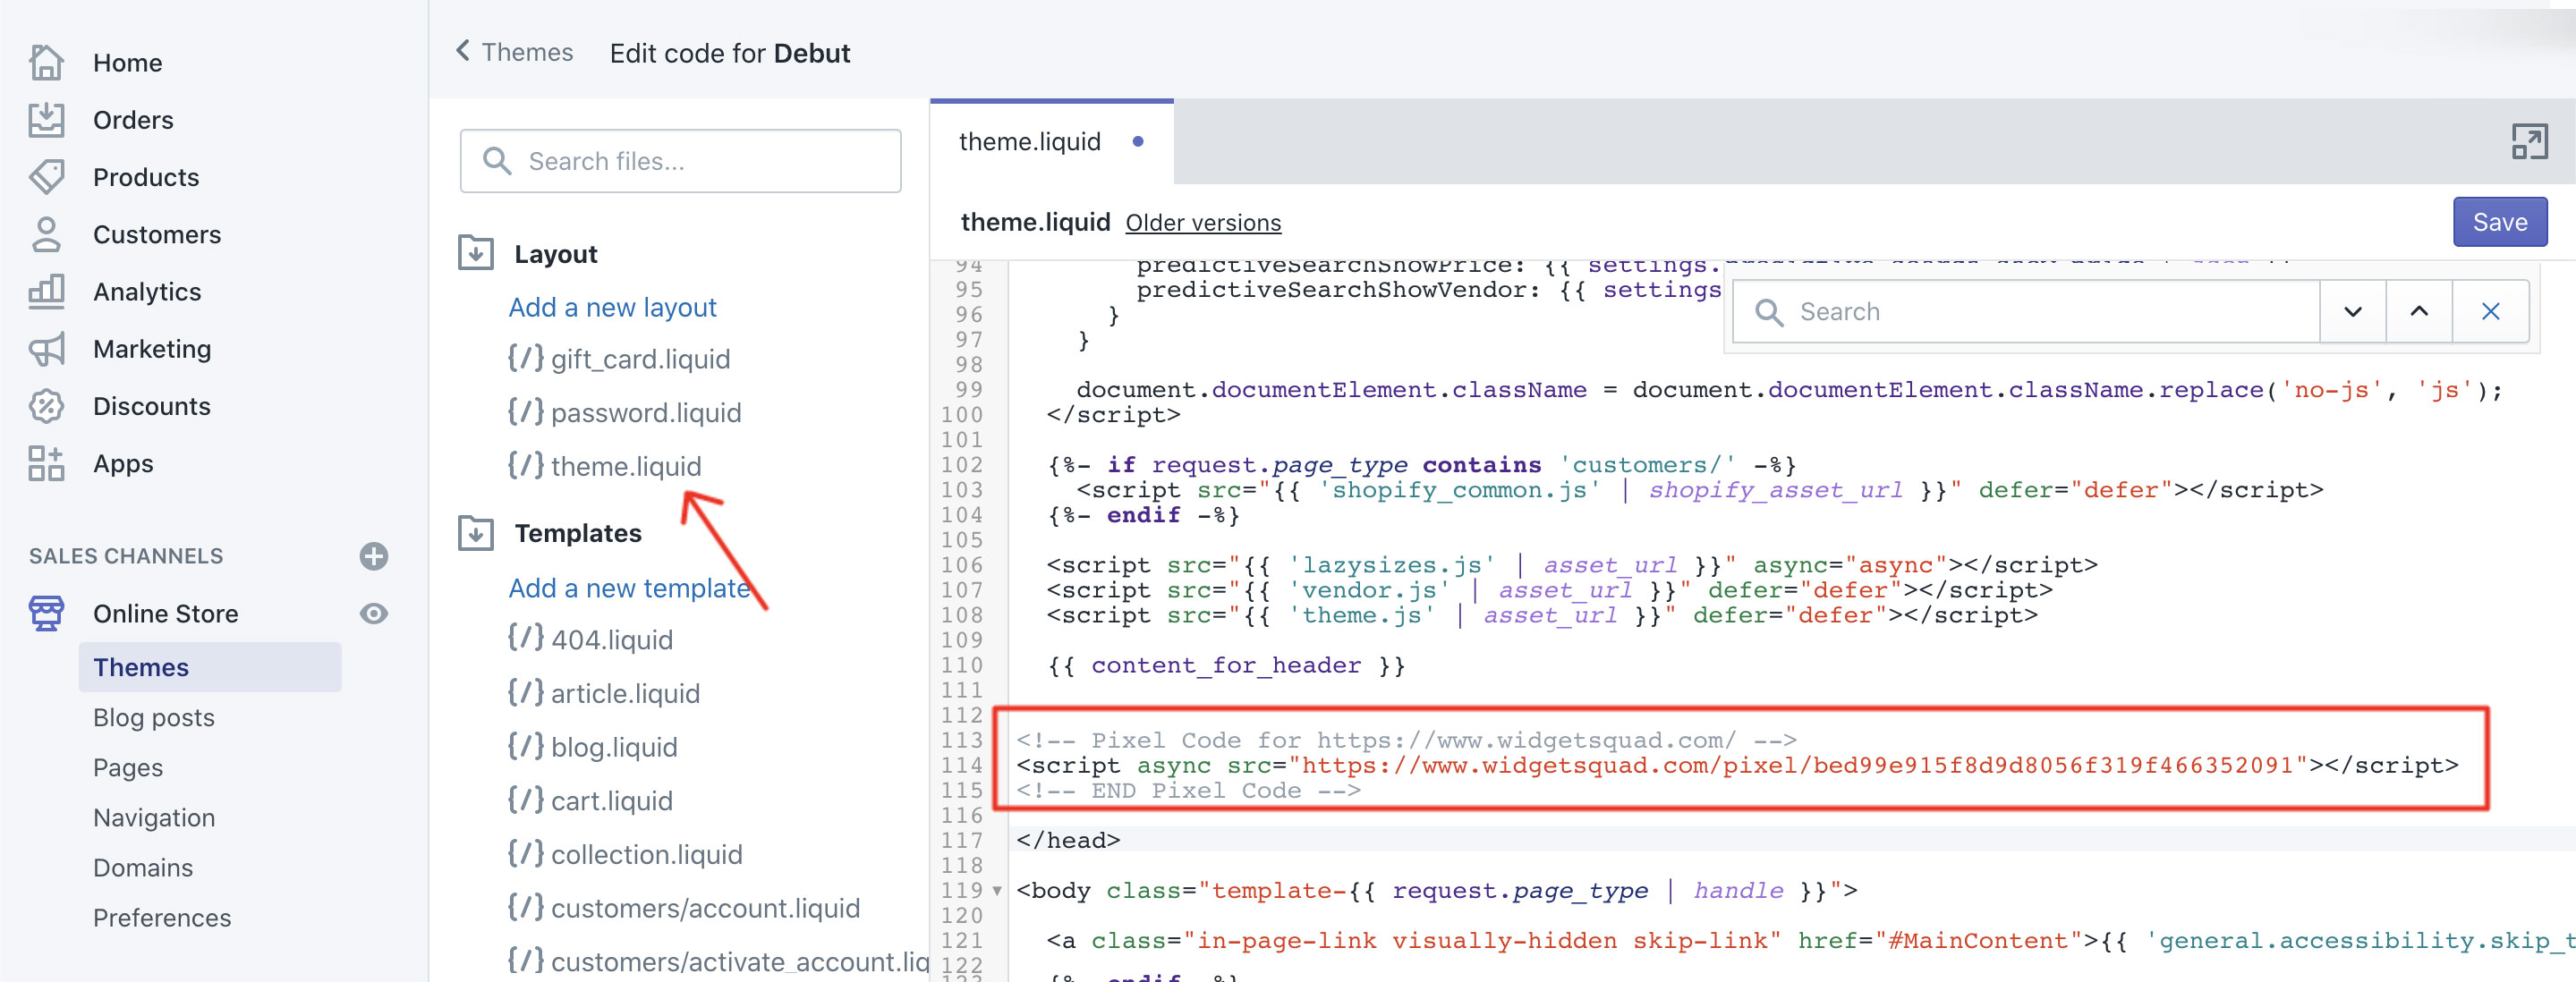
Now you can add your pixel code, just above <body> section. Save and refresh your site to see the results.
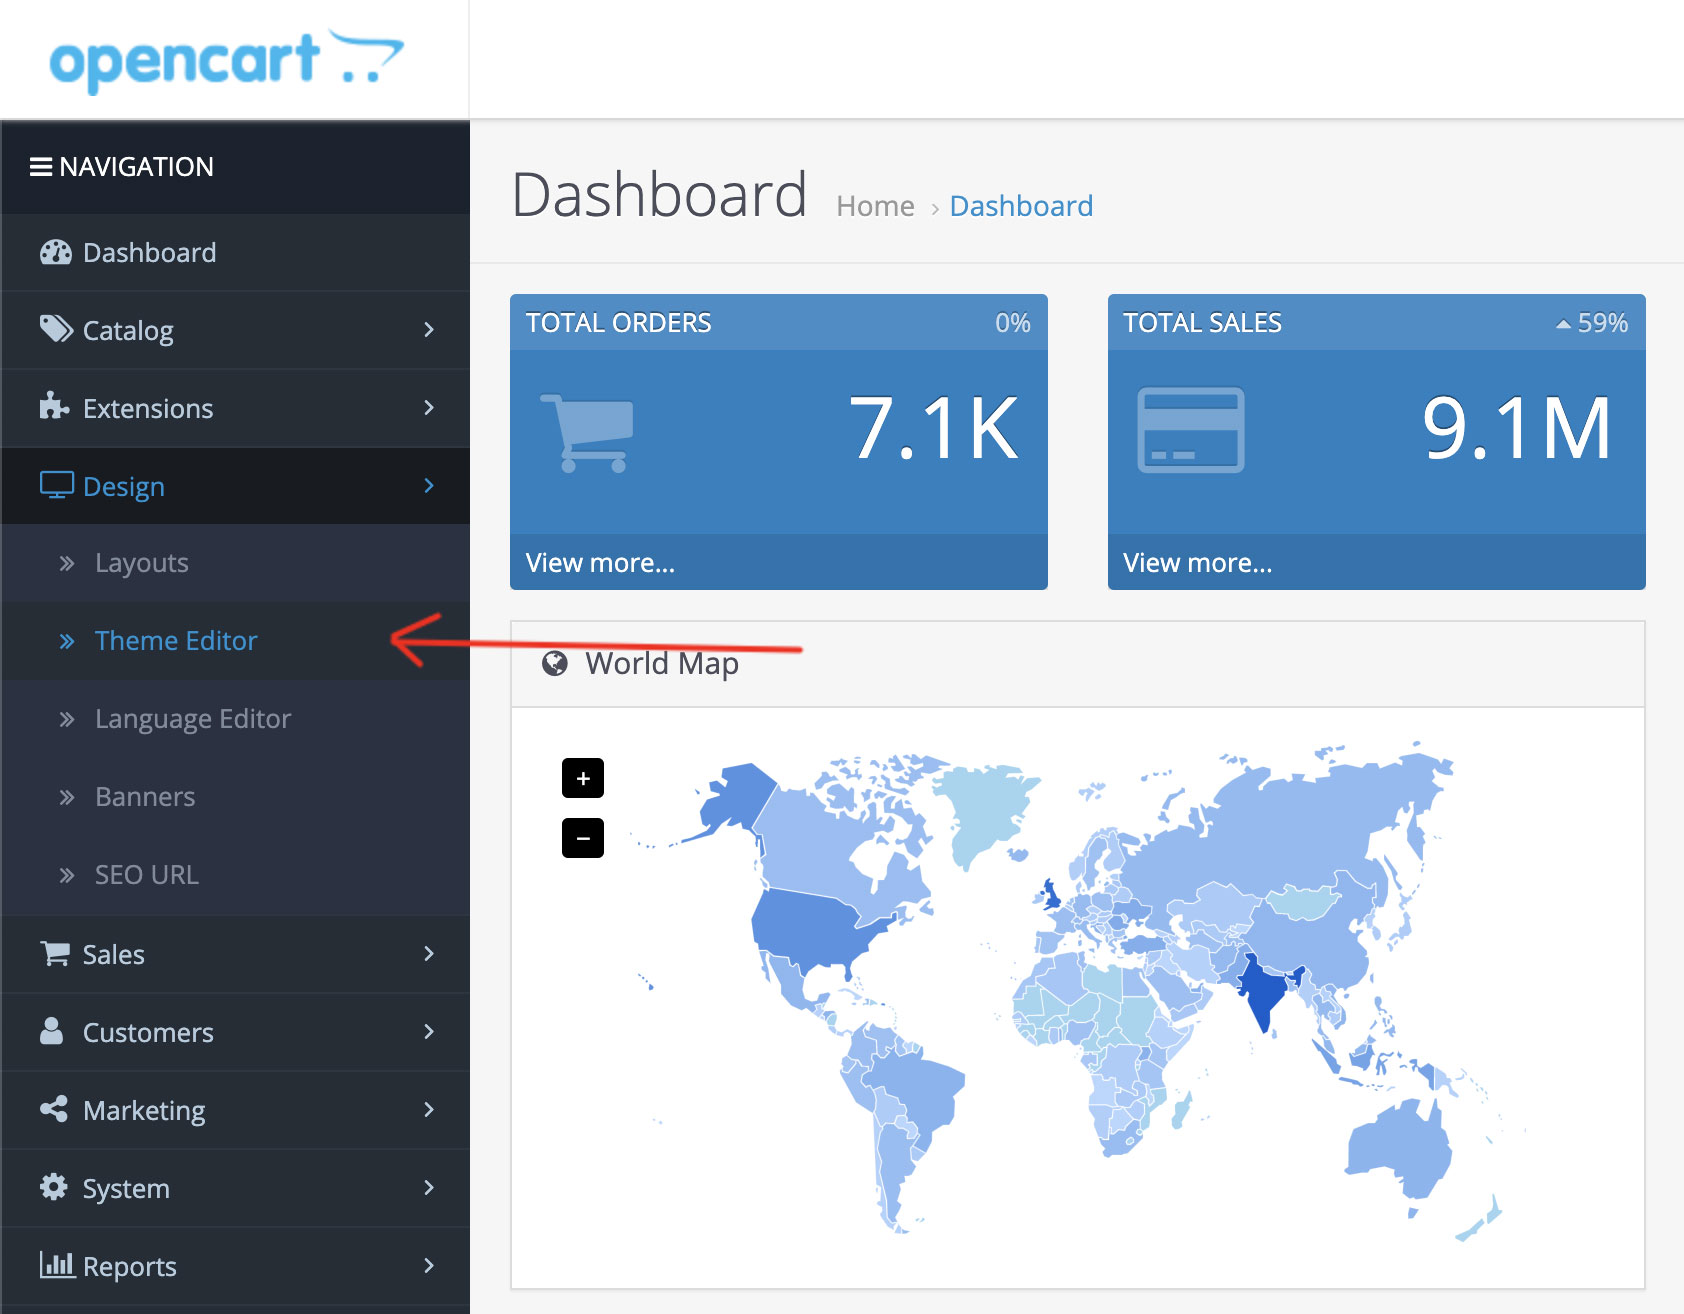
Step 1 : Login to your Opencart admin panel and click on "Design > Theme Editor"
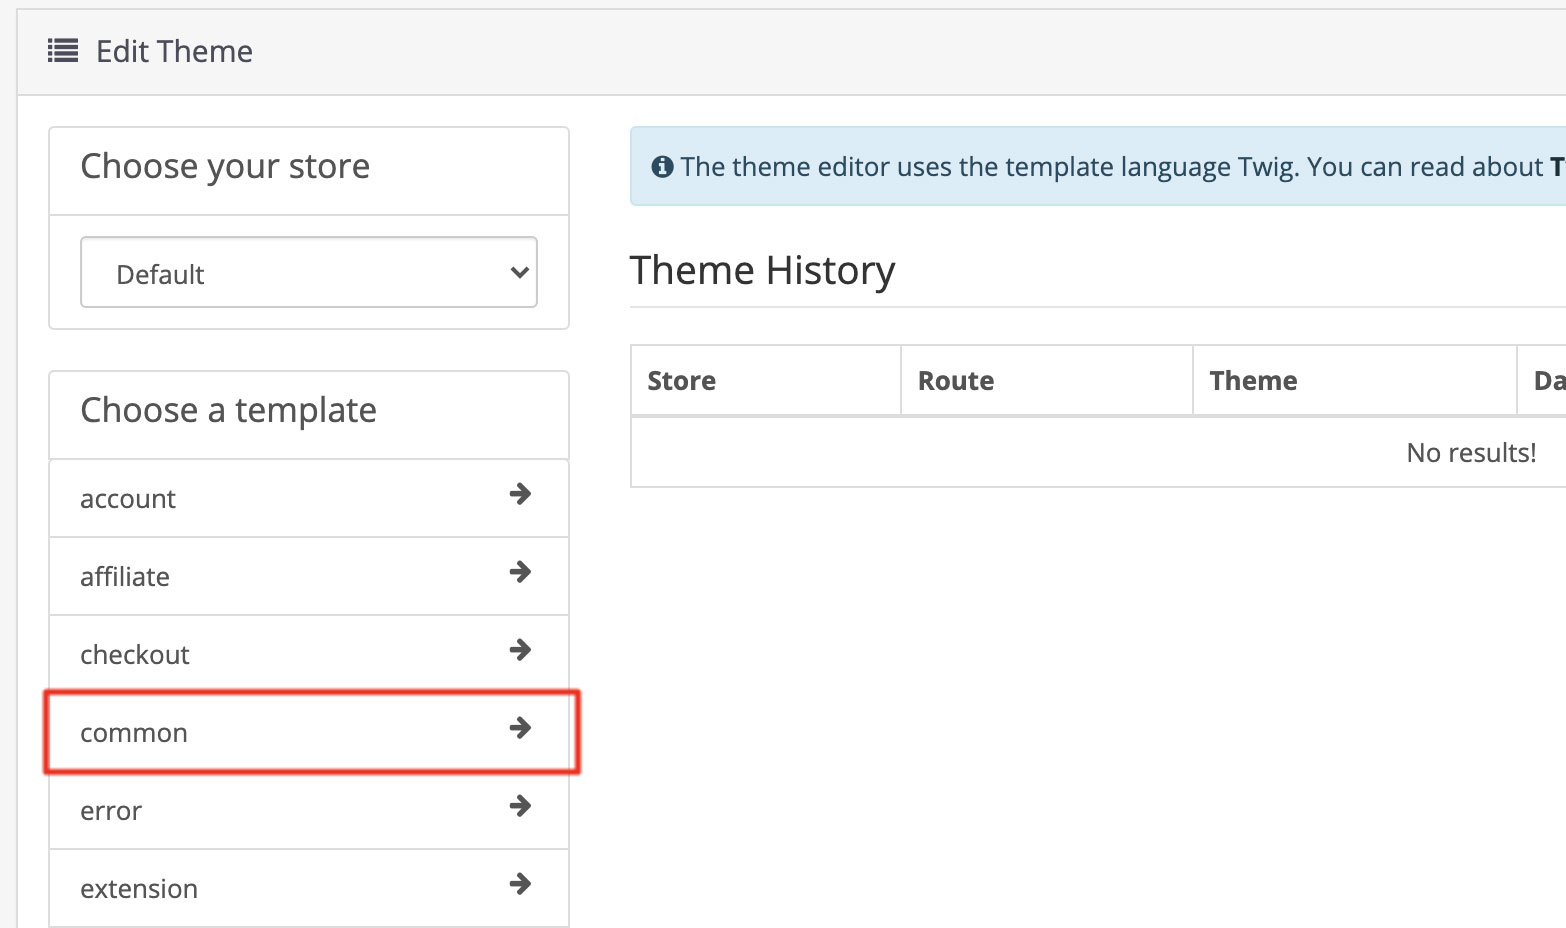
Step 2 : Select common from "Choose a template" section.
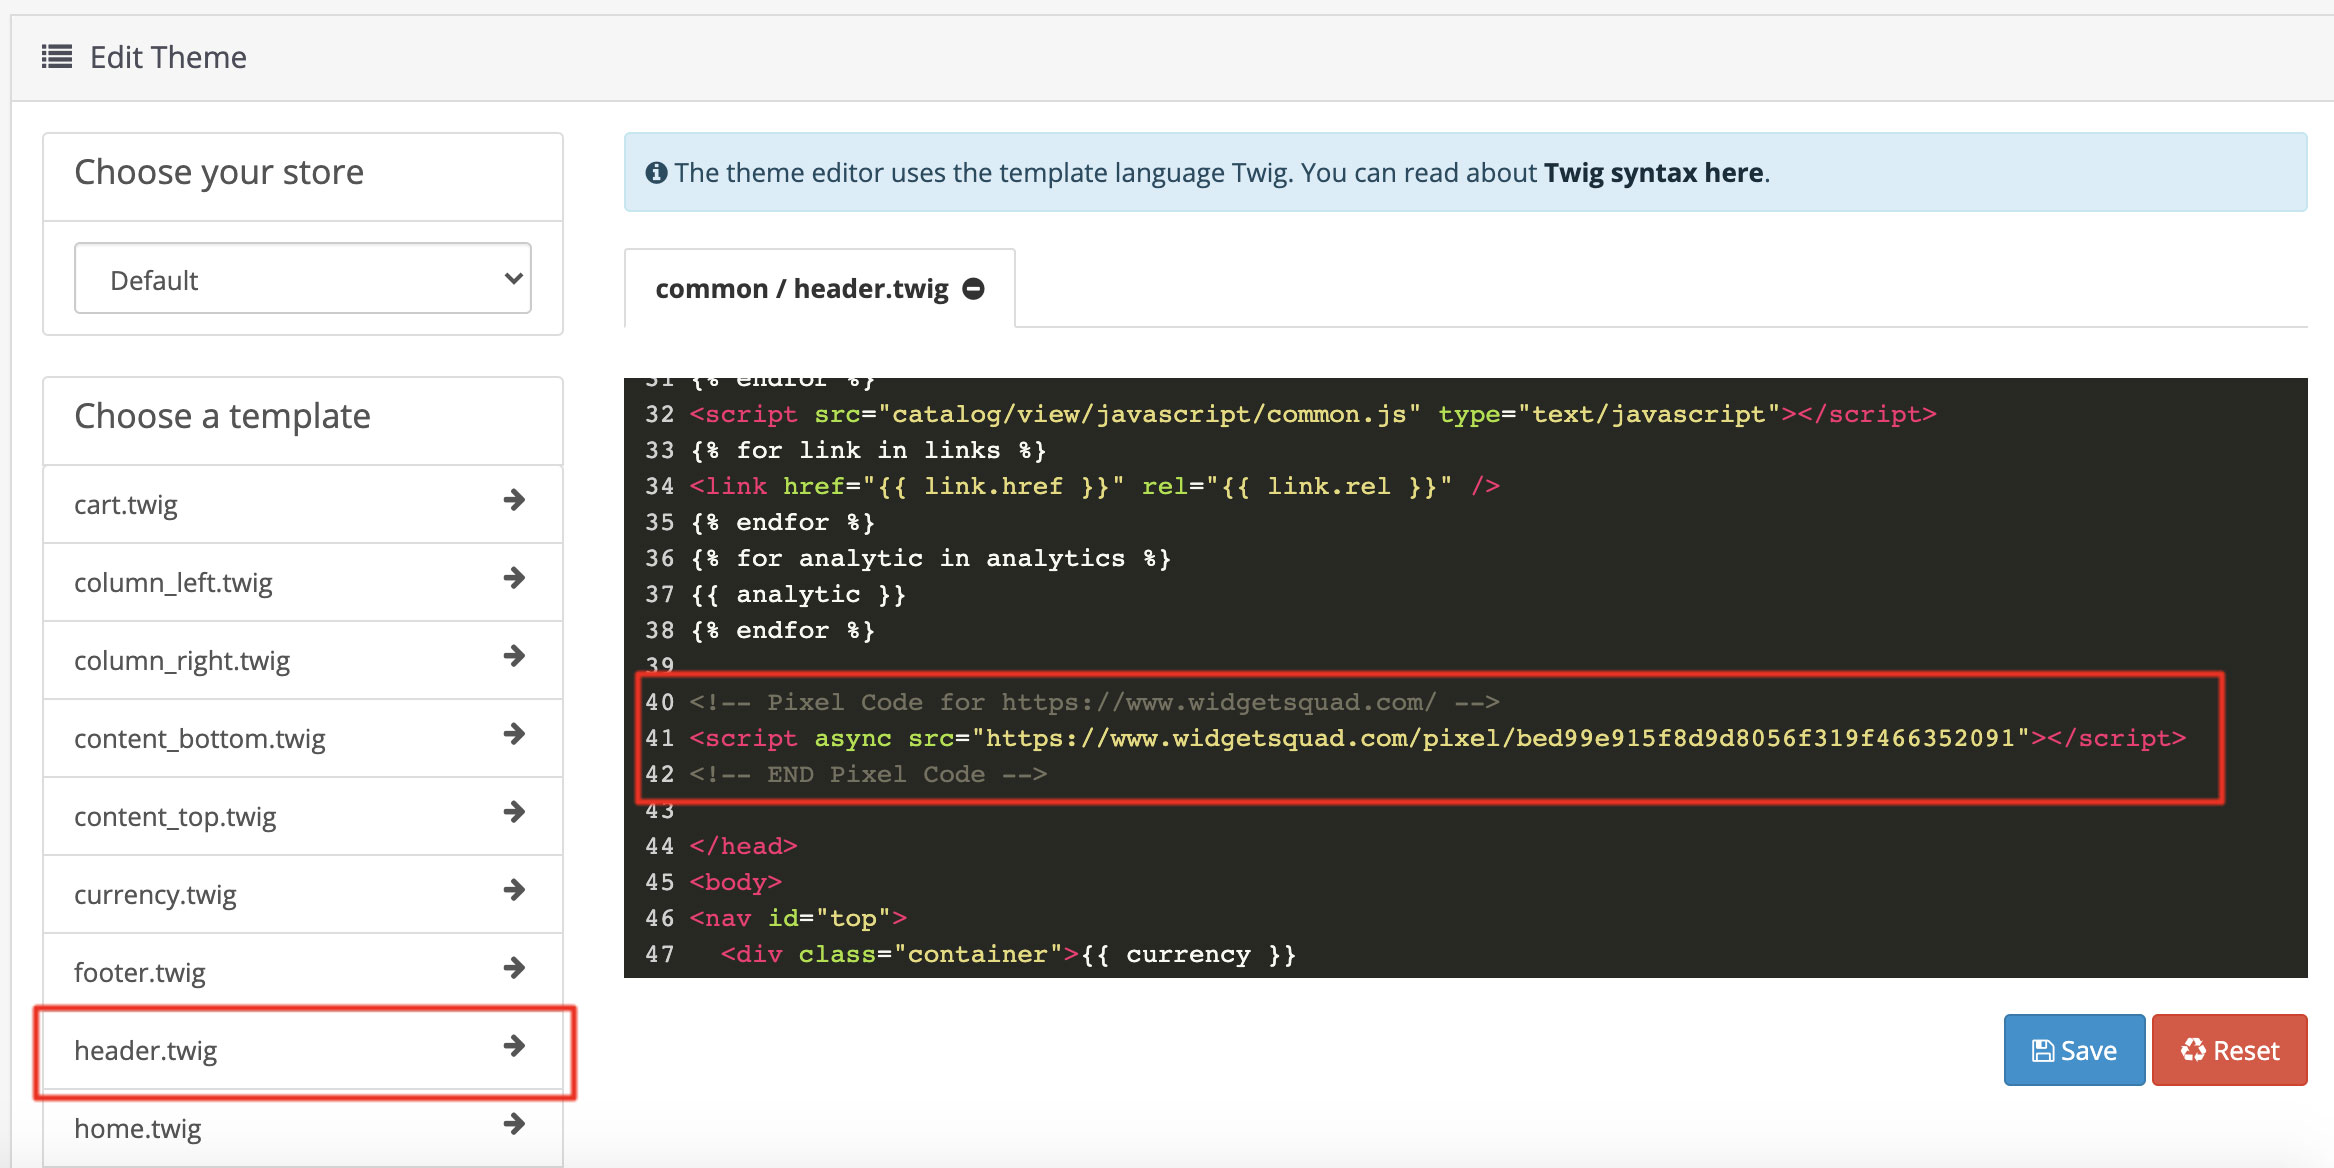
Step 3 : Now click on header.twig then past your WidgetSquad pixel code before </head> tag and Save
That's it!
That's it! you are ready to go.
[ 0 Out of 1 Found Helpful ]

Submit a ticket and we’ll get back to you as soon as possible.
